Best Kitchen Laminate Flooring Types For A Most Modern Cooking Area

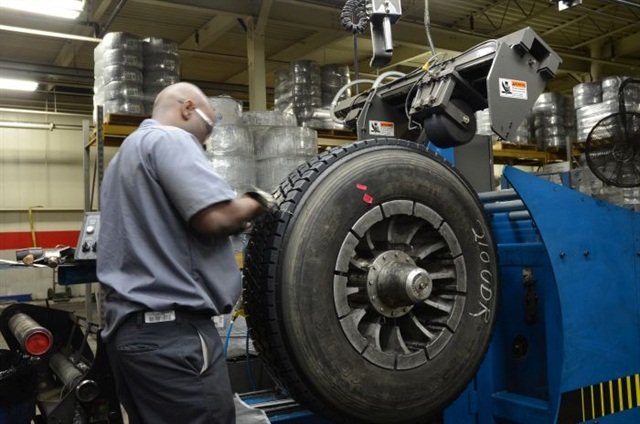
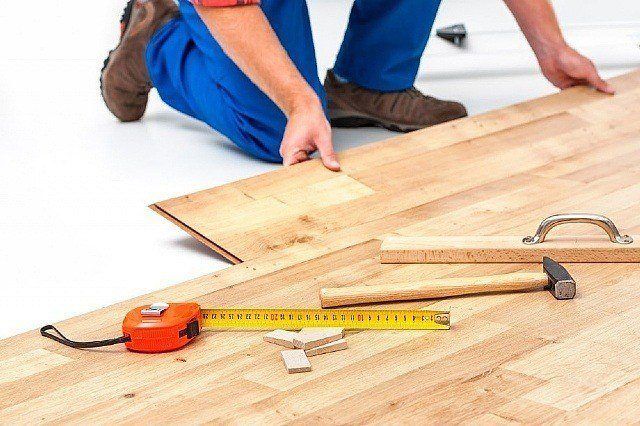
What is Laminate Flooring?

Laminate flooring is several layers of wood, wood composite, and resin that are heat fused to create a strong plank. A photographic print of wood or stone is placed on top. Clear laminate sealant is applied over the photographic print to provide shine and durability.

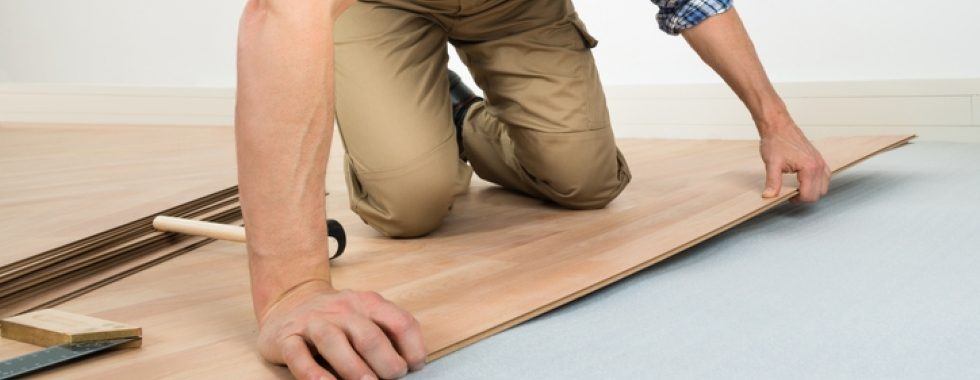
Laminate flooring is available in various sized planks and square tiles. These pieces can be cut to fit in irregularly shaped areas. Laminate flooring “floats” over the sub-floor on a layer of foam or plastic. This means that laminate is not nailed or glued to the subfloor. Some will argue that this adds to installation ease, but it may be the very reason why there is so much room for error.

Why you should trust laminate flooring

Although laminate flooring has its issues, it is still an incredible flooring product that you should seriously consider for your next reno.

Laminate is a strong competitor to hardwood flooring. In many cases, laminate flooring is actually more durable than hardwood. High-quality laminate withstands drops and scratches better. Yet, both laminate and hardwood flooring suffer from water damage issues.

You should choose laminate flooring because it’s affordable, attractive, durable, and sustainable—granted this is quality and manufacturer dependent.

How to Avoid Laminate Flooring Mistakes: Materials Matter!

A floor is the base of your house. It’s not wise to cut corners on your flooring because it is fundamental to your home, and it must withstand a great deal of traffic.

Cheap Products

People love laminate flooring because it is “affordable”. But don’t be fooled. There is a huge difference between cheap and affordable products! Cheap products have an indefinitely shorter life span than high-quality products. This means that you will have to buy and hire someone to install cheap products time and time again.

Laminate flooring is considered affordable because it can be very durable and attractive for a competitive price, in comparison to hardwood flooring or stone alternatives.

If you’re working with a contractor for your flooring installation, then ask them for their opinion on quality laminate brands. If you’re installing your own floor, then try giving a trusted contractor a call, or visit a flooring retailer and ask them about the best products to buy. You’ll receive a wide range of suggestions, many of which will be moderately priced. There’s no need to buy the most expensive product on the market. However, you will get what you pay for.

Durability

Laminate flooring is rated by an AC (abrasion class) rating to express product durability. Do not buy a laminate product that has a lower rating than AC3 (although a salesperson may recommend it, the flooring will just wear out quicker). For example, if your product scratches easily, then water will seep in, and you will need to replace it. Durable products don’t scratch easily like this.

Nevertheless, laminate has an inherent weakness to water. It can warp easily if it soaks in water. However, the quality of the product does determine how well it stands up to water damage.

Anyone purchasing laminate should opt for 12mm thick planks at the very least. This will be a more expensive product, but it will be more durable and it will muffle sound much better than thinner planks. Homeowners should focus on purchasing high-density fiberboard (HDF) core laminate flooring too.

Quality

High-quality products are reflected in their durability and appearance. High-quality products will have a higher number of different photo prints. This avoids pattern repetition upon installation, which makes the flooring look natural. A good contractor or installer will be able to assemble the flooring pattern well.

Toxic Products

Some types of laminate flooring contain melamine resin or other adhesives that contain formaldehyde. Once installed, these products release toxic fumes into your home, which are a health hazard. The fumes do reduce over time. Usually, lower-end laminate products contain these chemicals. Always ask the company or sales rep about these product details before you make a purchase.

Earth-friendly products tend to be safer, but this is not a definite safety indicator. Most European-made products are safer than their Asian competitors because of stricter manufacturing regulations.

Considerations For Installing Laminate Flooring Over Hardwood

Laminate flooring can be installed directly over hardwood, often with no preparation necessary. If your laminate has a built-in underlayer, you may install it right on top of the hardwood. If the new flooring does not have the built-in underlayer, simply roll out and tape your underlayment to the wood floor and begin installing the laminate.

If your hardwood floor is in very rough shape, you will need to do some preparatory work before installing the laminate. Any protruding nails or fasteners must be pulled (or sunk securely into the wood), and any floorboards that are bowed or angled up must be sanded down. If the hardwood floor is wavy, you will need to do some work to level it out before installing your laminate floor.

Installing a laminate floor over hardwood is a great option in many cases. For one thing, if you ever want to revert back to the original hardwood, you can simply pull out the laminate and the old floor has suffered no damage. Additionally, laminate flooring can mimic the look and style of the original flooring, without all the work of restoring the old hardwood. Finally, depending on the laminate you choose and the condition of your current floor, installing a laminate floor can be cheaper than restoring your old hardwood floor.

Can Laminate Flooring Be Recovered Once Swollen?

Laminate flooring is a great option for many homes, but one of its disadvantages is that it isn’t water-resistant. Small spills that are quickly cleaned up won’t harm your laminate flooring, but other factors such as appliance condensation leaks, constant high humidity, damp sub-floor, or large spills or water leaks that seep in the crack between the laminate planks can damage your flooring.

Once water gets into the cracks, it will swell the joints and cause the floor to swell, buckle and bubble. This can be unattractive, as well as unsafe, as it can cause tripping hazards. Once your laminate floor sustains water damage, is there any way to fix it?

The best way is to completely replace the damaged boards. There is no need to replace the entire floor unless the damage came from an issue with the sub-floor. If your sub-floor has a moisture issue, the best course of action is to take up the entire floor and install a more water-resistant option.

If your sub-floor isn’t the issue, and you only have damage in a small spot, use a hammer and pry bar to carefully remove the water-damaged planks. Make sure you’ve removed all the pieces with damage. If there are any damaged ones left, the could cause future problems. Be sure to air out the damaged area thoroughly to ensure that the area is completely dry before you install the new planks.

Many homeowners will order extra laminate flooring when they have their floor installed just for these types of situations. It can be difficult to find laminate flooring that matches your current laminate’s patter, texture, and finish. If you have extra planks from your original flooring installation, it’s easy to cut them to size and click them right into place.

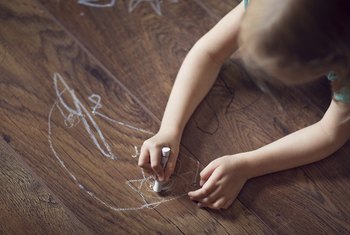
How to Remove Scratches & Scrapes on Laminate Flooring

Laminate flooring is a multiple-layer, synthetic product held together through lamination. The top layer is a tough plastic meant to stand up to daily wear and tear. While laminate flooring is fairly durable and meant to last for years, it can scratch and scrape fairly easily. Because the surface cannot be sanded, these scratches have to be repaired with wax or putty.

Matching the Color

The key to a successful repair of a scratch or scrape on laminate flooring is matching the color of the floor. Whenever possible, contact the manufacturer of the flooring to get your repair kit directly from them. Nearly all laminate manufacturers sell repair kits that consist of wax pencils, colored putty and a putty knife to help repair minor damage. If you don’t know the manufacturer of the flooring, try taking a sample with you to the store to get a repair kit that matches in color. If this isn’t possible, your best option may be to get a repair kit that allows you to mix up a custom color of putty at home.

Filling Minor Scratches

Filling a few minor scratches on a laminate floor can be done with a wax pencil that matches the color of the floor. The scratch is filled in with the wax, blending it into the rest of the laminate’s surface. Rub the tip of the wax pencil back and forth across the scratch in the opposite direction that the scratch is moving. Use short strokes to fill in the scratch from one end to the next. Once the scratch has been filled with wax, use a soft cloth to gently buff the edges of the repair until it blends in with the rest of the floor.

Fixing Minor Scrapes

If you have a wide scrape or a deeper scratch, a wax pencil won’t be enough to fill and repair the floor. In this case, floor repair putty is used. Use either a putty knife or a wooden craft stick to spread the putty across the scrape or scratch. Hold the knife at a 45-degree angle to the floor and press the putty across the scrape from multiple angles to ensure it gets filled completely. Turn the knife on its edge and scrape it across both the surrounding floor and the repair to level off the putty and ensure a flat, even repair. The putty will harden within a day to become a permanent repair.

Repairing Major Scrapes

If you have a laminate floor board that is extremely scratched or that has very deep scrapes that go right through the top layer, wax or putty will not be enough to fill them. In this case, the board should be removed and replace. Remove the baseboard at the nearest wall and pull up the boards until you reach the damaged one. Replace it with a new board and put the other boards back in place to the wall. Remember to leave a gap at the wall for expansion and replace the baseboard back over it to finish the repair.

What You Need To Know About Wedding Videographer

What questions should I ask my wedding videographer?

You’ve decided on your wedding videography style and researched some pros in the area. What’s next? Interviewing your candidates. To help you get started, we’ve compiled a list of 10 questions to ask your wedding videographer before hiring them so that you can find your best match.

A wedding is a once in a lifetime event, or at least we hope for it to be. It comes as no surprise that nobody wants to compromise on the quality of the wedding photos and videos. After all, the video and photos are the only remembrances that are left after our wedding day.

A good videographer is essential to be present at the wedding so that everything can be recorded for being watched over and over again. But you will be surprised to learn that it is very hard to get a good videographer nowadays who you can rely on to make the kind of video that you want. To make the best choice, you must know the questions to ask your wedding videographer.

Questions to Ask Your Videographer Before You Book

Are you available on our wedding date?

Many videographers are booked months, if not years, ahead, especially the really good ones. So, before you launch into your questions and ask about their offerings, find out if they’re even free on your wedding date.

What is your style of videography?

Suppose you’re at the stage of speaking with a wedding videographer. In that case, you should already have perused their portfolio to get a rough feel of what their story-telling style is because there is no such thing as a standard wedding video and not every style suits every couple.

Perhaps you prefer wedding videos shot in the cinematographic style of a movie? Or, maybe, you’re partial to a fast-paced news style or a slower, more documentary style where your love story will unfold? You’ll only know what style your potential wedding videographer shoots if you’ve watched their showreels and videos of previous weddings.

If you like their general style, but want something a little different, don’t immediately discount them. Ask the question: what other styles can you shoot in?

Why? Because they may have multiple camera operators and editors who can shoot and cut a video in your preferred style even though their showreel doesn’t necessarily reflect it.

What is your videography background?

Following on from the previous question, ask about your wedding videographer’s background because they can be quite diverse, from self-taught practitioners who are true video artists to those trained at film school or a TV station or on a film set.

Your videographer’s background will affect their style of videography, but also how they do things overall. It’s wise to ask about sort of training and experience the person you’re putting in charge of recording your big day has.

How many weddings have you filmed?

No matter how experienced your videographer when it comes to filming and editing, you want to know how many weddings they’ll have filmed before your big day.

Filming a wedding is vastly different from filming, say, a TV commercial or a film. Weddings are about capturing certain key moments and conveying the feel of your big days and telling a story. You want to know that your videographer, no matter how technically perfect he or she may be, will be able to read the mood of your event and, of course, record your big day without missing out on key moments.

Is The Videography Crew Shooting Any Other Wedding Besides Yours On That Very Day?

Some videographers try to make more money by committing to two weddings on a single day. This can be disastrous for both as they will be in a hurry to make it to the other wedding and may potentially ruin your wedding video in the process. If your videographer does two or more weddings a day, make sure they have multiple crews to avoid this issue.

What equipment will they use?

If you’re not a videographer, knowing the exact make and models of equipment will not make a difference. However, having a basic understanding of what equipment they use, based on what’s included the package you’re considering (like this breakdown) will give you a better understanding of why the videographer charges what they do and how it will affect your wedding video.

Experience

When you look for a wedding videographer, look for someone who is constantly shooting weddings. On average, a busy wedding cinematographer will record about 20-25 weddings per year. Above 25 weddings could be overkill.

First of all, make sure that your videographer has done more than thirty weddings. If she/he has done more than fifty weddings, it could be easily considered an experienced videographer.

Being unobtrusive

One important matter to discuss is how they work. I have seen videographers who are very obtrusive, so much, that they have 2 or 3 videographers very close to the bride and groom while doing the first dance or when they are dancing with their parents. They are very obtrusive in a way that it is impossible for the wedding photographers to capture a decent picture of the couple. Many videographers, trying to capture exotic angles or images for their highlights, become noisy and noticeable during the wedding ceremony and during the reception. Make sure they are respectful, unobtrusive and share a good working relationship with the photographers or any other vendor.

Video Length

Ask how long your wedding video will be. I have heard of wedding cinematographers that charge a great amount of money for their service, but only provide a 5 minute highlight and unedited raw footage. If you pay a couple thousands more, they give you 20 to 30 minutes wedding video. They reason is that a video of more than 30 minutes could be boring and people would not enjoy it. I am one of those wedding videographers, who does not believe that. I think that the client could get a nicely edited wedding video of the entire wedding without being boring. If you would like to jump to certain part of the video, you can always fast forward to the  part you want to watch. Your parents, grandparents and future children will certainly not think that it’s too long or boring, in fact, it will not be long enough for them!

What will the sound setup be?

Depending on the videographer, you could have a boom mic hanging above your face throughout the day, a standard microphone set up during the ceremony, or a clip-on mic affixed to your attire. Have a chat with all prospective videographers about how they capture sound and what the quality of sound is like. It’s also good to give them an idea of what you’d like captured on mic so they can tell you whether or not it’s possible.

How many cameras will be on us?

The number of cameras and video cameras that will be in your face on your wedding day is an important thing to consider, as it can become overwhelming. Most photographers and videographers work with assistants and/or second shooters, so you’ll want to keep this in mind when booking.

How long will it be before we get a wedding video?

Depending on the time of year and busy schedule of your videographer, this could vary greatly. Be sure to get an idea upfront and ask again after booking so that you can have a realistic expectation of when you’ll receive the edited video.

What If I Need Changes To The Film?

Sometimes people ask for changes.  It’s unusual for us to get change requests to a finished product, this is because we have a few steps before to make sure that we understand you, your style, and your requests well before we arrive on the day.  Things like questionnaires, meetings and talking with your planner ensure that we capture things that are special to you, and edit in a way that you like, including music and pacing.  If you don’t like too much posing, your videographer should know in advance, if you don’t like a certain type of music?  A good videographer will know this too.  If you wanted a certain shot, that wasn’t included, most videographers aren’t going to charge you for a simple adjustment, but if you want songs changed, or entire portions of the day re-edited, there will likely be a cost associated with it.        

How Much Do You Cost?

A wedding videographer can literally cost anything.  You can spend as much or as little as you want.  Just like the variance we talked about with the price and quality of a Toyota vs a Rolls Royce, you can indulge in any budget you see fit. This is part of what makes it so hard to shop for one.  It’s a creative service in the end, and because of that, the price range can quite dramatically.  Even within the same company.   A seasoned videographer is going to be at least, or more expensive than your photographer.  A videographer will often have more gear that can cost between $10,000 and $50,000. So trying to find a videographer worth their salt,  to film a wedding for $500 is going to be unlikely.  Off-season rates are sometimes discounted, amazing locations are sometimes discounted. If you’re a couple that seems fun, who values wedding video, and who is working with wonderful vendors, you might be able to get a better deal than someone who says “we didn’t originally want to get a videographer, but we were told we should.” For us, every year we book wedding films at more than $10,000, or some for just $3000  

Local Moving For School

Movers Estimated Cost

Why do I need a professional mover?

Whether you’re moving out of your parents’ for college dorm living or finally upgrading to that dream house this year, getting a new address to call home is fun and exciting. But packing and moving can be such a hassle. It’s tiring, it’s stressful, and it takes up a lot of free time. Plus, the more stuff you have, the more you have to move!

Enter professional movers. Because it’s literally their job to, a moving company can efficiently make fixing up your new place easier for you. Hiring the right moving company can make all the difference in the world.

What do movers do?

The most common jobs for movers involve local moves from one house or apartment to another. Some will even help organize and pack your belongings. Others can safely move specialty items, such as pianos or appliances

How much does it cost to move?

Moving to a new home does require you to spend a few bucks. “I get information from them, I stop at their house, and I determine how many men are needed and what the hourly rate will be.” Just need a few items moved in a truck from Point A to Point B? Then you’re looking at $90 an hour. If moving includes full-service like boxing, crating, packing, or storage, your expenses can go up to $150 including the packing supplies.

Pricing factors

There are a lot of different factors that could affect the price of your move. For example, residential, local, and intrastate moves are less expensive than if you truck to a new city or cross country. “It’s more expensive to move in the summer and the weekend,” said. “The summer is high demand for the mover industry. Every moving company is raising their pricing. You can essentially create your prices to land the job because it’s the busiest time of the year.”

Moving Your Office Without Losing Rankings: The Local Business Owner’s Guide

cringe every time a business owner tells us they want to relocate their office. There is a lot that could go wrong when a business moves, but Google is slowly getting better at solidifying the process.

Update Your Website First

Make sure you check all the places that your address is listed on your website and update them to list the new address instead.

Update your location page. This may be your “contact” or “about us” page, but every local business owner should have a page that is dedicated to providing information about their office location.

Check your website footer and header, and update the address there if listed.

Check the code on your website and update the Schema markup. Run the new markup through Google’s Testing Tool to make sure it shows your new address location.

Add photos (interior and exterior) of your new office location, along with detailed driving directions to your new address. Highlight that you have moved recently so your customers aren’t confused.

Find The Listing On Google For The Previous Business And Mark It Closed

If you are moving to a new office, it’s likely that there was a business that occupied that location before you. Find out who that is, and make sure you mark their business listing as closed. Use these steps to find the listing for the other business.

Once you have the listing(s), you can submit the edit in MapMaker to mark the business closed. It is helpful to include comments in your edit stating that this business has recently closed and a new business is moving in. This will help the Regional Leads approve your edit faster since it’s likely that Google’s Street View will still show the old business.

Update Your Address Inside Google My Business

Log in to your Google My Business dashboard and update the address there. Make sure you not only update the address but also look at where the pin marker is.

Local Moving

A lot of people make the mistake of underestimating short distance moves. Whether it involves moving to another town or to an apartment just a few blocks away there are a wide range of issues that can create challenges. The surprising news is a short distance move can easily turn out to be more difficult and stressful than a long distance relocation. With a cross country move, you load up everything one time and haul everything to your destination. If a short distance move is not planned properly, it can turn into multiple trips that seem to increase exponentially and a growing list of to-do’s. It’s easy to understand why people react negatively to the prospect of relocating

Moving Costs Involved

Moves are considered local when they are well within 100 miles and within the state of origin. Here are some average moving costs you need to know:

Local movers typically charge $25 per hour per mover

A small studio apartment on average will require two movers and will require about 2 to 4 hours to load your stuff, transport them and unload

Two bedroom apartments of roughly 900-square feet will have an average cost in the range of $300 to $450 for the labor alone

Larger homes with over 5,000 square feet will cost around $1,200 for the labor and can be considerably higher depending on the amount of furniture that needs to be moved

Hiring Movers For Short Distance Moves

Some people prefer to “DIY” (do it yourself) a short distance move. If it’s just a few blocks away, what could possible go wrong, right? Like most people, you will probably make the all too common mistakes like taking shortcuts in packing, leaving boxes unsecured, stuffing everything in your backseat and trunk and tossing those knickknacks in paper bags. And, like many, you will end up damaging some of your most valued possessions.

BE CLEAR

Before you sign on the dotted line, make sure you understand the terms, the exact quote and the pertinent details of your move. It is important that you provide a complete list of items you need assistance in moving such as your piano, fridge, dishwasher, oven, etc. This will help them plan what tools and equipment they need for the job and the size of the truck needed for hauling your possessions from point A to point B.

BE CAUTIOS WHEN CHARGED BY THE HOUR

There are some movers who offer considerably lower rates and charge by the hour. The trouble with charging by the hour is some of these service providers purposely end up using more time than it would normally take to facilitate the move. Its very important to know your dealing with a reputable mover when being charged by the hour. When it comes to moving, or any service for that matter, the lowest rate is usually not the best option.

Make a Move

Keep in mind that the lowest price may not be the best deal – especially those offered on Internet message boards or sites. You might fall prey to a dishonest moving company that may demand more money to unload your possessions or fails to show up for delivery.

Before you hire a mover, first check our Truck Stop, the database that can tell you whether a company is licensed

also prepared Moving Tips and a Moving Checklist to help you with your move. If you do have a problem, we’ll try to help. Please take the time to read the information below so you know what steps to take before and after the move.

Inventories

Some licensed movers may offer to prepare a descriptive inventory of your items for an additional cost. The inventory should list all items to be moved and their condition. The document should be signed by both you and the mover at both the point of origin and the destination. Remember to review the inventory for accuracy before you sign it.

Packing and Loading

Depending upon your agreement with your mover, you may be doing some of the preparation for your move. If you’re doing your own packing, be careful about overloading boxes. To avoid damage, do not pack fragile items with heavy items in the same box. Mark fragile boxes. Do not pack valuables (such as jewelry or money), medications or important papers for loading into the mover’s truck. The mover is not responsible for these items.

Moving house checklist

Who should I inform about moving house?  Even if you use the Post Office’s mail-redirection service, it’s a good idea to inform important companies, such as banks and utility companies, directly. Make a list of all the companies and organisations you need to inform, including their contact details and when to do it by.

List of organisations and companies to contact Here, we explain which organisations you’ll need to contact, and the key considerations to take into account.

Government bodies Update your address with the DVLA for both your licence and vehicle registration – but not before you move, as you may need your licence for identification and van hire. Depending on your circumstances, you may also need to contact HMRC or the Department for Work and Pensions.

Financial institutions Banks, lenders and credit card companies will need to know your new details. This is especially important with current account and credit card providers, which may use your current address as a security check or to verify your identity.

Insurance providers You should notify your contents insurance provider of when and where you will be moving. Check with them what is and is not insured during the move, as you may need to get additional insurance from them or the removals company.

Considerations When Hiring A Divorce Lawyer

Questions To Ask Your Divorce Lawyer During Your First Meeting

The process of seeking a divorce can be very stressful and conflicting. Even people who are happy to get away from a dissenting spouse and move on with their life will find the ordeal of a divorce to be very overwhelming.

When you are going to an initial meeting with your divorce lawyer, you may feel very confused and out of your depth. To make sure you make efficient use of your time with your lawyers, you should prepare some questions to ask divorce lawyers before meeting with them.

Below are some of the most important questions you need to ask:

How long have you practiced divorce law?

The experience of your attorney matters a lot when it comes to your divorce. There are some cases where the spouses separate amicably and negotiate all the issues among themselves. However, if you are dealing with child custody and a significant amount of property.

You can ask your lawyer how long he has been practicing in the field of marriage and family law, how many cases they have handled, how many of those led to a courtroom trial, and how many were won. It is very important to find out that your lawyer is confident and comfortable in front of a judge.

You should also ask them if someone else will be working on your case, as a junior attorney or paralegal. This is important since you need to know which tasks they will handle and how much each person charges.

How often should we communicate about the case?

Your communication frequency will depend upon how complex your case is. The more challenging the divorce issues, the more communication is needed. Typical divorce cases may require communication one to four times a month. Complex cases, however, may require communication way more times than that.

Ask your lawyer their preferred methods of communication as well. Generally, phone calls, video conferencing, in-person meeting and email are common. The mode of communication also depends on the client and lawyer’s needs and urgency.

Do You Have Experience With Any Cases Similar To Mine?

Forrest Gump may have been on to something when he famously declared that life is like a box of chocolates. We truly don’t ever know what we’re going to “get”.

Just as each individual is very different, each marriage and family is different, too. Some separations or divorces involve children, some involve already blended families, long distance and a vast array of other complex conditions. A lawyer who has experience in dealing with cases that are similar to your situation may be beneficial.

Do you have a team or any associates that will be working with you on this case?

Law firms, just as many other businesses and organizations, can vary greatly in size and complexity. Some larger law firms may have you meet with one lawyer initially and then have a different lawyer working on your case at a later time.

When it comes to divorce, some pretty personal details are almost always shared. Understanding whether or not the lawyer you meet with initially will be the one representing you throughout the case is an important consideration you may want to feel confident with.

Divorce Attorney Duties

Do you think that you get emotionally involved in your case?

This is a great question. On one hand, you want an attorney who can be objective, level headed, and help reduce the emotional tension in your case. On the other hand you want an attorney who will believe in you.

Do you consider yourself a trial attorney or a transactional attorney?

The reality is that divorce attorneys need to both be able to “get the deal done” and go to trial and win when a resolution cannot be reached.  Divorce attorneys are both transactional and trial lawyers.

In your opinion, is it better for a case to settle or go to trial?

For the vast majority of people, the best divorce cases are the ones that are settled by agreement. For a minority of cases, especially ones with domestic violence or other issues of impaired parenting, a beeline for trial is the best course of action.

Do you see going to court as a last resort or as a first resort?

Most cases should start in a settlement posture, going into a litigation phase only if settlement fails. However, some emergency cases will need swift and precise litigation at the onset of the case.

Do you prepare for litigation with the contingency of settlement, or prepare for settlement with the contingency of litigation? This is another way of framing the question above.

Are you familiar with local family court judges?

Before enrolling in a college class, you probably asked a few other students what the professor is like, how she grades, and what her stance of tardiness is. Hiring a lawyer is similar because, before you do so, you want to make sure they know your local judges’ reputations and directions in which they tend to rule. If the judge assigned to your case tends to be lenient with custody and you’re seeking sole custody, you’ll want your lawyer to be aware of this so that she can plan a strong strategy.

Do you believe it is better to mediate and negotiate than go to trial?

The most important element when it comes to hiring a divorce lawyer is that you see eye-to-eye. If you want to mediate and negotiate, but your lawyer is dead-set on going to trial, that disagreement could impact your case’s success.

What Can I Expect The Divorce Process To Be Like?

Divorces are difficult even in the best of circumstances. Every divorce is very different, and the timing and difficulty of the process will depend on the issues that the parties need to resolve and the level of cooperation between the parties. However, most divorces follow a similar process.

The process includes filing for divorce, serving or notifying the other party, gathering information, possible temporary orders to address child custody, support and managing assets during the divorce, and some form of resolution through either a settlement agreement or a court hearing. During your initial meeting with a divorce lawyer, the lawyer will talk with you about this process. He or she can also gauge how complicated and lengthy your case may be based on the property and child-related issues you discuss.

What Are My Next Steps After This Meeting?

At the end of your meeting with your divorce lawyer, you will have some decisions to make. Some clients will need to hire an attorney immediately, especially if their spouse has already started the process. Others may not be ready to file for months. Your lawyer will likely give you a written contract and will require a deposit (a retainer) to take your case.

Your lawyer may also require more information from you before he or she can file. Before you leave the meeting, be sure to ask the lawyer what they need from you to effectively prepare for the next steps in your case.

Tell Me About Yourself

Your divorce lawyer will have an enormous amount of influence on how your divorce goes forward. You should ask your lawyer whether they have experience with the special circumstances in your divorce and learn what he or she will bring to the table. Each divorce attorney also has his or her own philosophy and approach to handling a divorce case. As with any professional, you want to make sure your lawyer will be a good fit for you and what you hope to accomplish.

Posted inLegal

Electrical Services A Circuit Breakers Can Provide

COVID-19: Our guide to staying home and surviving the circuit breaker period

Feeling trapped within your four walls? Running out of activities to do? Get through the circuit breaker

pretty much in semi-lockdown – the government having introduced “circuit breaker” measures calling for everyone to stay home – your bedroom is now your office, delivery services are the mealtime norm, and social interactions are limited to online chats and gatherings.

Our day-to-day routines have certainly been turned on their heads, but fret not, there are several ways to entertain yourself and your loved ones at home, while keeping your mental health in check.

Staying home can put us in a gloomy mood. If you’re in need of some wellness tips, check out our list of podcasts for a healthier mind and body. The list includes podcasts with excellent fitness tips, nutrition advice as well as ways to improve your mental health.

Do you constantly feel sluggish? Find yourself constantly reaching out for that packet of chips? To keep your fitness in check, we put together a list of health apps to download on your phone. There are also wellness apps that help you to keep tabs on your diet, and control your alcohol intake.

Your regular gym and exercise studios have closed, but there are still ways to get your workout in while being confined within your four walls. We test drive some of the most challenging online workouts available on the Internet right now.

Selecting the Right Circuit Breaker and Its Type

A circuit breaker is a power system protection device that can make or break a circuit A circuit breaker operates under fault conditions and isolates the faulty part of the circuit from the rest of it by breaking the circuit. This operation is performed automatically by employing a relay along with the circuit breaker.

It should be noted that circuit breakers may also be manually operated and can also be operated under normal conditions. Hence circuit breakers are also useful switching devices that are used to make or break a circuit in normal conditions.

Working Mechanism:

​In a general sense, a circuit breaker consists of two electrodes or contacts that under normal conditions remain in contact with each other allowing current to flow. But in case of a fault, the contacts open or become disconnected hence breaking the circuit and preventing the fault current from passing through.

The opening of contacts is achieved by energizing the tripping coil of the circuit breaker which causes the contacts to move as shown in the figure. It is also important to know that the tripping coil is energized by the relay, so basically it is the relay that signals to the circuit breaker to operate.

Arc Phenomena:

​Whenever a short circuit fault occurs, an extremely high current passes through the contacts of the circuit breakers. When these contacts start to open, the area of contact decreases and the current intensity increases rapidly. This causes the surrounding material to heat up rapidly and ionize. This ionized medium thus acts as a path for current to flow delaying the breaking of the circuit path.

Types of Circuit Breaker Service Life and Number of Poles

Circuit breakers have an electrical life and a mechanical life:

The electrical life refers to the average number of times the circuit breaker can trip before failure.

The mechanical life refers to the average number of times the circuit breaker can be manually tripped before failure.

Number of Poles

Another characteristic shared by all product lines is that circuit breakers are available with a varying number of poles, according to the number of phase conductors in the protected circuit:

1-pole: Single phase

2-pole: Two-phase or single phase & neutral

3-pole: Three-phase or two-phase & neutral

4-pole: Three-phase & neutral

The purpose of using a circuit breaker with multiple poles is to make sure all lines are interrupted simultaneously. The use of single-pole circuit breakers for multiple-phase circuits is unacceptable, since only the line compromised by the fault will be cleared, and this can cause a second fault. For instance, a motor can be severely damaged if only one of the phases is disconnected: all three must be disconnected if there is a fault.

This article will provide an overview of the main types of circuit breakers, including their characteristics and applications.

Types of Circuit Breakers and their Applications

Circuit breakers have the basic function of providing electrical protection to equipment and circuits. There is, however, a wide range of circuit breakers available, including:

Miniature circuit breakers – DIN rail type

Miniature circuit breakers – Plug-in type

Molded-case circuit breakers

Motor protection circuit breakers

Motor circuit protectors

Hydraulic-magnetic circuit breakers

Each type of product is suited for different applications, but all of them share the basic function of interrupting dangerous currents which may cause damage to equipment or wiring, and which also represent a hazard for personnel. All types excluding the final two are based on thermal-magnetic protection, which has the following operating principle

Thermal protection interrupts slight over-current conditions, or overload. Circuit breakers have a carefully calibrated internal mechanism that expands in response to temperature, and it is calibrated such that it will interrupt electric current when the rated current of the breaker is exceeded. The reason why the thermal protection mechanism is designed with a slow response is to allow short duration over-current, which is a normal part operation in many types of equipment. Electric motors, for instance, may draw from 5 to 8 times rated current during startup, but only for an instant.

Magnetic protection interrupts fault currents, which have much higher magnitudes than overload and occur during line faults, short circuits, etc. As implied by its name, magnetic protection is based on induction- a coil inside the circuit breaker produces a very strong magnetic field when there is a fault current, and the internal contacts are immediately tripped. Since faults represent a high-risk condition and are never part of normal operation, they must be cleared immediately.

Breaking Capacity of Circuit Breaker

Breaking Capacity

With respect to magnetic protection, there are two key specifications that must be taken into account:

Service breaking capacity (Ics) – The largest current the circuit breaker can interrupt without suffering permanent damage.

Ultimate breaking capacity (Icu) – The maximum current the circuit breaker can interrupt, although it will suffer permanent damage if the value exceeds Ics. If a fault current exceeds Icu, the circuit breaker is not capable of interrupting it and the fault must be cleared by the main breaker, which has a higher breaking capacity by design.

For example, if a circuit breaker has an Ics of 10,000 Amperes and an Icu of 20,000 Amperes:

Any fault below 10kA will be cleared with no problem.

A fault between 10kA and 20kA will cause permanent damage when cleared.

Any current exceeding 20 kA can’t be cleared by this breaker.

Selection of breaking capacity greatly depends on the application at hand. For instance, the fault currents that can be expected in a small residential installation are of much lower magnitude than those found in the main switchboard of a large industrial facility.

Home Inspection Scope Of Work

Home Inspection Tips for Sellers

For home sellers, the home inspection can be like a scene from a reality television show. Strangers arrive at your front door and dive into every nook and cranny of your personal space. For hours on end they open closets, crawl through your belongings, turn on every faucet in the house. They flush toilets, open electrical panels, fire up your oven and run your washer, dryer or any other appliance they can find. Then, they climb your roof, wander through your basement or crawlspace, and seemingly trounce over every square inch of your yard.

From downspouts to dishwashers to smoke detectors, the home inspection process is by its very  nature – intrusive.  Your challenge, as the contestant in this show, is to remain pleasant, cheerful and completely accommodating while these personal invaders tear through your home.  But – if you survive the harrowing ordeal without blowing a fuse, the payoff can be big:  a windfall of hundreds of thousands of dollars from the sale of your home!

According to a joint study by the American Society of Home Inspectors (ASHI) and the National Association of Realtors (NAR), nearly four out of every five homes sold in the nation are evaluated by a professional home inspector before they are sold.

Hired by the home buyer, home inspections are designed to protect the buyers from investing in a home that turns out to be a real life money pit. NAR reports that Realtors recommend real estate buyers get a home inspection nearly 99% of the time. Most buyers heed that advice, requesting home inspections in 84% of all transactions, even for new homes.

For sellers, understanding the home inspection process and preparing your home for the inevitable evaluation not only helps to ensure that the transaction goes through, but can often translate into getting a top-dollar selling price as well.

A Seller’s Guide to Preparing for the Home Inspection

In all likelihood, the buyer will hire a general inspector who will spend 2-3 hours in your home, going over it from top to bottom, “looking for trouble, but hopefully not finding any.” The inspector will look closely at the roof, the HVAC system, the electrical system, the plumbing system and the structural integrity of the home. He will also test the appliances, open and close all the windows and doors and look for signs of deferred maintenance.

No home is perfect, so be prepared for a laundry list of requested repairs from the buyer after the inspection. At that time, we’ll discuss each item and determine whether or not you want to address it. However, prior to the inspection, it’s a good idea for you to go through the home with your tool kit (or with your handyman – let me know if you’d like to talk to mine) to correct as many items as you can ahead of time.

If you don’t hire your own inspector, here are some items to take a look at, and correct as needed:

HVAC system – have it cleaned and serviced. If repairs are needed, make them

Make sure most windows open and close, and that the locks work

If you have removed the screens from your windows, re-install them

Check for leaks in faucets and under sinks

Dust off the water heater

Ensure that sinks and tubs drain quickly

Ensure that all light fixtures have working bulbs

If toilets wobble, replace the wax ring and bolt down firmly

Clean up cobwebs in basement

Clean gutters

Replace cracked or broken window panes

Caulk around tub

Clean out gook in faucet filters (to maximize water pressure)

Fix squeaks in wood floors, if you can

Ensure patio doors slide smoothly

Roto-Rooter your sewer line

Ensure downspouts have extenders

Have your roof inspected, and make repairs as recommended

Dig up receipts and warranties for recent repairs

How to Prepare for a Home Inspection: Tips for Sellers

As a seller, you may feel nervous about how to prepare for your upcoming home inspection. Fortunately, there are things you can do in advance to help things run more smoothly. That’s why we rounded up home inspection experts

Hire a professional

The first step in how to prepare for a home inspection is to hire a professional and reputable home inspector

Leave the house during the inspection

Prepare to be out of the house for at least three hours to allow time for the inspection. Buyers are often present during the inspection; they may feel uncomfortable asking questions if the seller is present. If you are unable to remove animals from the property, be sure they are crated or otherwise secured. – Safe Check Home Inspections

The house needs to be in a clean, orderly, and readily accessible condition. Stored items, personal items, and furniture greatly impact the ability to test and inspect numerous systems throughout the home. Is the sink full of dishes? Are the moving boxes blocking access to the air conditioner and water heater in the garage? Access issues during an inspection do not reflect well on the report and could also be a negative for the buyer.

Replace light bulbs

Replace all dead light bulbs inside and out prior to inspection. If you are using low wattage bulbs, replace them with nice, bright lights prior to inspection. Bright lights may help your house show better as well

A BEGINNER’S GUIDE TO PREPARING FOR A HOME INSPECTION

Getting a home inspection carried out on your home that you’re trying to sell doesn’t always fill you up with excitement, but failing to prep your home for the inspection could lead to a delay in the sale. Besides, the last thing a seller needs is for a home inspector to accidentally break a fixture or cause damage to a wall because the home was not adequately prepared for an inspection.

A home inspection is usually the final hurdle before you can stick a ’SOLD’ sign in the lawn of the front yard, so it’s essential to put your best foot forward and get your home ready to be looked at closely. To help you do so, Elementary Property Inspections has formulated a Beginner’s Guide to preparing for a home inspection. By following this guide, as a home seller, you will be able to prepare your home for a home inspector to properly inspect the property, and not have to return for a follow up because of an inability to access some areas for inspection.

Getting Started

What tools do I need?: No tools are necessary to be prepared for a home inspection. All you need to do is be ready to clean and move personal property out of the way.

How can I benefit from the inspection?: Home inspections allow a buyer to ensure that all of the systems of the home, plumbing, electrical, structure, roof, etc., are working correctly, and if not, as the owner, you will know what areas need to be addressed so that you don’t have to renegotiate the price. The home inspector will offer recommendations on how to correct any issue found.

Clean the house: This sounds so simple, yet homeowners often overlook this tactic. Home inspectors are people first and inspectors second. As people, they carry preconceived ideas of how well a home has been maintained. Clean homes say you care and take care of the house. It’s a great idea to make a good impression. Don’t make the mistake of thinking they can see past stuff; they can’t!

Guide to home insurance inspections

After completing a home insurance application, the provider may require a home inspection. That means an inspector from the insurance company will come by to look at the home. Although most of us may not be thrilled about a stranger coming by to poke around our home, many insurance providers request an inspection before signing off on a new home insurance policy

Why do insurance companies require home inspections?

The main purpose of a home insurance inspection boils down to one word: liability. An insurance liability is anything that could create risk for the provider when they agree to underwrite a policy that insures a home. Although applications for home insurance are thorough and should include an exhaustive list of potential liabilities in the home, many insurance providers want to make sure nothing is overlooked. Thus, insurance companies require home inspections to ensure the application accounts for all liabilities in the home.

Benefits of a home insurance inspection

Home inspections aren’t just to satisfy insurance providers. These inspections can help homeowners.

A few of the benefits homeowners get include:

The inspector is looking for potential risks that could impact claims. Uncovering risks that are previously unaccounted for protects the homeowner. Once the risks are identified, the homeowner can address them.

Home insurance companies also discount their policies for home features like security systems and fire alarms. Anything in the home that could provide a discounted premium will also be identified during the inspection.

Home inspectors will look into the level of coverage for the insured home. Homeowners don’t want too much or too little coverage for their home, so getting a second opinion from a professional is always helpful.

Cost of a home insurance inspection

The cost of a home inspection will change based on your provider and the home’s location. State Farm estimates that home inspection costs range from $300 to $500. However, you generally only have to pay this cost if you want an inspector for your own purposes, such as you’re buying or selling a home. If an insurance provider requires an inspection, the provider generally sends the inspector out and pays for their time. You shouldn’t be charged for the inspection if it’s for insurance purposes.

How to prepare for a home insurance inspection

Before the home inspector arrives, there are a few pieces of information that you should have on hand. Gathering these documents before the home inspection will make the process go smoother.

The information to have for the inspection includes:

Square footage documentation: This is helpful to verify how large the home is and whether or not the coverage limit is correct for the value of the home.

Renovation details: Any changes to the exterior or interior of the home made by the homeowner should be documented to show the inspector. These changes will affect the home’s value and, therefore, the amount of coverage.

Home systems and alarms: Any documentation you have on home systems and alarms will be helpful to have on hand. Many home insurers offer discounted policies for specific home systems and alarms.

New Tax Preparation Rules

Tips for cutting the cost of getting your taxes done

Many taxpayers stress about the size of their tax bills this time of year, but many more may be stressing about the size of the bill to calculate their tax bills. It now costs $188, on average, to have a tax preparer do a Form 1040, according to the National Society of Accountants. Itemize and add a state return, and the average rises to $294.

For many people, the struggle to find affordable, high-quality tax preparers is real, but experts say five things can help rein in the cost.

See if you can get free help

The IRS programs — Volunteer Income Tax Assistance (VITA) and Tax Counseling for the Elderly (TCE) — provide free tax prep services generally to people who make $54,000 or less, have disabilities, are older than 60 or speak limited English. This can be a huge money-saver if you qualify.

Read the contract

“Typically, tax preparers that want a long-term relationship with you will have some type of an engagement letter. That will help you understand how the preparer’s fees work, and it may give you a heads-up on whether there will be charges for things such as extra copies of your return.

Preparers can’t base their fees on a percentage of your tax refund amounT, and they can’t charge you a separate fee for having the IRS direct-deposit your refund.

Start early, get organized

Tax preparers often charge more as the April filing deadline nears, so the earlier you get your documents to them, the more you could save. Many preparers draw a line in the sand somewhere around the last week of March. After that, fees often start rising.

Ask for a break if you need it

Negotiating tax-prep fees isn’t very common, but sometimes it’s OK to ask for a discount.

“If you’re having a bad year and you’ve been with somebody for a long time and something’s happened, somebody’s lost a job, you’ve lost a spouse, you’ve had something that’s out of the ordinary, I think there’s nothing wrong with calling your preparer and saying, Is there anything you can do for me?

How to Get Your Taxes Done Right

Taxes. If you’re like most, you’re not a big fan of this five-letter word. While it’s true that income tax preparation can be frustrating and complicated, knowing these basics can save you money, time, and stress.

1) Understand Taxable Income

The amount of taxes you pay is based on your taxable income rather than your total income. Reducing taxable income means you pay less come tax time.

2) Don’t Miss Any Tax Deductions

Because deductions reduce your taxable income, the more deductions you have the less you’ll owe in taxes. That means you don’t want to miss any if you’re itemizing. Download our Tax Preparation Checklist to make sure you’ve got everything you need.

3) Take Advantage of Tax Credits

Tax credits are a big deal because they reduce your tax bill dollar for dollar, rather than just reducing your taxable income. Find a good tax pro in your area to help you take advantage of every possible credit like child care or small business expenses.

4) Pay Attention to Your Withholdings

Withholdings are a percentage of your paycheck your employer sets aside to cover your taxes. We recommend adjusting your withholdings so you break even. You won’t get a big refund from the IRS but you won’t send them a huge check.

5) Determine If You Need a Tax Pro

If your tax situation is simple, you may be able to handle it on your own. Once your financial life gets a little more complicated though, having a pro check for every possible deduction and credit is worth it.

Ways to Reduce Your Taxes for Next Year

Feed the IRA, lower your taxes

One reason that financial advisers consistently recommend contributions to a retirement plan as the best way to reduce a tax bill is that most of those contributions—depending on the type of plan—are essentially tax write-offs that don’t require itemization.

Because the money you contribute to a traditional IRA is a pre-tax contribution, it lowers your total taxable income. This means you will owe less in income taxes, regardless of whether you itemize or take the standard deduction. And because in recent years contributions made until the tax deadline have been applied to the return for the previous year, they have been popular among people who scramble to soften the blow of a large tax bill.

Flex your spending power

Sometimes, to save money on the tax bill, you must spend money elsewhere. Many employers offer a benefit that allows people to chip away at the tax bill using money they had planned on spending anyway, such as dependent care or medical expenses.

Flexible spending plans are pre-tax plans that allow certain expenses—such as dependent care, medical expenses and health insurance—to be paid with tax-exempt dollars. Employers deduct pre-determined, tax-free amounts from paychecks and place them in an administered account that releases the funds when the expenses are incurred. And, because contributing to a flexible spending account also reduces your gross income, your taxable income becomes even lower—keeping more in your wallet.

The first is the “use it or lose it” stipulation, which comes into play if the pre-tax funds aren’t used in accordance with the rules. Let’s say that Mom deducts pre-tax money to pay the day-care center, but then Grandma starts to take care of the baby. Unless Grandma operates a licensed, approved day-care center and charges for the care of the baby, any pre-tax money Mom set aside for day-care is lost.

Second, you can’t use child care for a tax credit. Because the tax benefit was given in the flex-spending plan, that money cannot be used for a credit unless the amount spent exceeds what was deducted pre-tax. Other child-care expenses not paid with pre-tax money, such as some summer camps, would not be impacted.

Give back

Charitable contributions offer a tried-and-tested way to reduce the tax bill—and there are a number of ways to give back beyond writing a check. Toys, books, clothes and other used household items may be donated to shelters or other charitable organizations that support the needy.

Expenses stemming from volunteer work can also be a tax benefit, but be careful about what you try to deduct: Your time itself is not deductible, but if you absorb the cost of travel to an event where you represent the charity—whether as a convention delegate or as a scoutmaster driving scouts to a campground—those expenses may be deductible. If you buy an item such as a printer and donate it to a charity for its own use, that also may be a write-off. And remember, your total tax deductions must exceed the standard deduction before they may be applied.

Bundle contributions

For taxpayers who need extra tax savings, there’s a nice little tactic that Thompson recommends as a way of itemizing deductions every other year. By “bundling” some contributions, taxpayers can put what is essentially two years’ worth of deductions into a single year, vaulting their deductions over the standard threshold and thereby allowing the use of all of the smaller, otherwise-forgotten deductions.

Take, for example, the person who makes a gift to a church on a weekly basis. One approach might be to take the amount donated over the course of a year and—at the end of the year—match it with a lump-sum amount representing what would have been the next year’s donations.

And now that the bundled contribution has taken you beyond the standard deduction, feel free to start piling on all of those other smaller write-offs, too. Start with your wardrobe: Don’t forget to clean out your closet and donate clothes in the latter part of the year to take advantage of as many donations as possible. It’s a smarter idea than opening your wallet in order to save taxes.

Buy stuff (but only if you need it)

There’s a common misconception that buying “stuff” at the end of the year—something like a new laptop computer—can be a quick and easy deduction for your business.

It may be, but make sure it’s something that you needed to buy regardless of the tax write-off potential, Thompson said. The amount that’s actually a deduction for “stuff” is usually only a fraction of its true cost. Because many products have a life expectancy of several years, the value is often depreciated, and the deduction is calculated over several years unless the item can be expensed or bonus depreciation taken. In reality, a $500 computer might save only a few dollars in taxes.

Those with home-based businesses also may have some write-offs for the use of their homes, but there are plenty of rules defining what is and what is not deductible here. Only a fraction of home expenses—such as utilities or insurance—is covered, because the expense is only applied to the portion of the house where you work.

Eye Care For Good Vision

Eye Diseases

Glaucoma

Glaucoma is the second greatest factor leading to permanent blindness in the United States. The aqueous humor is a water-like fluid that occupies the anterior chamber of the eye where the pupil, lens, iris, and cornea are located.

The fluid provides the eye with nutrients and the necessary pressure to help maintain the shape of the eye, known as intraocular pressure (IOP). Glaucoma is generally caused by an increase in IOP, which subsequently damages the nerve fibers of the retina and the optic nerve.

Symptoms

The development of glaucoma can be asymptomatic as the condition tends to progress gradually. However, in some cases, the condition can progress rapidly, causing the following symptoms:

  • Blurry vision
  • Headache
  • Nausea and emesis
  • Severe eye pain
  • Tenderness in the surrounding areas of the eye
  • Reddening of the eye(s)
  • Seeing halos around lights

Risk Factors

Individuals from Asian, African or Caribbean backgrounds are at more risk of developing the condition as well as those whose parents or siblings have also be diagnosed with the condition. Furthermore, the prevalence of glaucoma typically increases with age and is more common amongst individuals with long-sightedness or short-sightedness, and with medical conditions such as diabetes.

Cataract

Cataracts are characterized by cloudy patches of the eye’s lens. As the condition progresses, the patching typically increases in size resulting in misty or blurry vision and potentially, blindness. The condition is usually seen in both eyes. However, the rate of progression may differ between eyes, meaning a cataract may not develop in both eyes at the same time.

Symptoms

Common symptoms of a cataract include:

  • Perceiving colors to be faded
  • Difficulty seeing in low light
  • Finding lights glaring or too bright
  • Blurry or misty vision

Pain may be experienced if the cataract is in an advanced stage of progression, or if there is another comorbid ocular condition.

Risk Factors

Like glaucoma, cataracts are commonly found in older adults. However, they may be seen in young children or babies. Other risk factors include parents or siblings being diagnosed with the condition, prolonged use of steroids, smoking, excessive drinking, and medical conditions such as diabetes.

Diabetic Retinopathy

Diabetic retinopathy is a complication of diabetes. The condition develops as a result of high levels of blood sugar which damages the retina. If left untreated or if not diagnosed, it can result in blindness.

Symptoms

Early-stage diabetic retinopathy tends to be asymptomatic. Early signs of the condition can be detected through routine eye tests.

Risk Factors

Those with type 1 and type 2 diabetes are at risk of diabetic retinopathy. However, specific risk factors may increase the likelihood of developing the condition, including:

  • Being from an Asian, Caribbean or African ethnic background
  • Being pregnant
  • Having high blood pressure and cholesterol
  • Having diabetes for a long period
  • High, persistent blood glucose levels

Refractive Errors

Myopia (short-sightedness) and hyperopia (long-sightedness) are common refractive errors. Individuals diagnosed with myopia often have difficulty viewing distant objects.

Distant objects appear blurred. In contrast, those with hyperopia can see these objects, yet, close objects appear blurry. Both conditions can range in severity and are common in both adults and children.

Symptoms

Refractive errors can cause headaches, squinting due to eyestrain, dual vision and seeing halos around bright lights.

Risk Factors

Myopia tends to run in families. Therefore, you’re at risk of developing the condition if one or both of your parents are short-sighted. Further risk factors include spending prolonged periods focusing on close objects such as reading and not spending enough time outdoors.

Eye Diseases that Can Cause Legal Blindness

Types of Blindness

The greatest fear many patients with eye disease have is “going blind.” Preventing or slowing down the process that leads to losing vision starts with understanding what can cause blindness and what the available treatments are.

Vision impairment is defined as having less than normal vision.

Absolute blindness, defined as having “no light perception,” is rare. When someone has absolute blindness, that person can’t tell the difference between light and dark, even when a bright light is shined into the eyes. Assistance from the government and foundations is available for persons living with this degree of blindness.

By contrast, legal blindness is defined in the United States as visual acuity that is best corrected (with glasses) at 20/200 or less in the better eye, and/or a visual field of 20 degrees or less. Legally blind patients qualify for benefits from the government. People with legal blindness may still have some usable vision.

Legal blindness can be caused by several eye diseases, which we explain in more detail below:

  • Age-related macular degeneration (AMD)
  • Retinitis pigmentosa
  • Diabetic retinopathy
  • Cataract

Retinitis Pigmentosa

Rare genetic diseases affecting the retina can also cause legal blindness. For example, retinitis pigmentosa can cause “tunnel vision,” in which only a tiny window of central vision remains. Such patients might be able to read 20/20 size letters, but would be legally blind because of the small visual field. Retinal gene therapy developed at the Scheie Eye Institute at the University of Pennsylvania has recently been FDA approved for one form of the hereditary retinal disease called Leber’s congenital amaurosis. The treatment works by injecting normal copies of the RPE65 gene into the retinas of patients born with mutations in this gene. It is expected that additional research will lead to gene therapy for other forms of hereditary and acquired eye diseases.

Thyroid eye disease

Thyroid eye disease (TED) is an eye condition that causes the muscles and soft tissues in and around your eye socket to swell. TED usually happens when you have a problem with your thyroid gland.

TED may also be called thyroid associated ophthalmopathy (TAO), thyroid orbitopathy, Graves’ orbitopathy or Graves’ ophthalmopathy (GO).

The period of inflammation and swelling caused by TED is known as the “active” stage. This generally resolves on its own over a period of about six months to two years. After this, the inflammation settles, and this is known as the “inactive” or “burnt out” stage.

How can TED affect my eyes?

The most common way TED affects the eyes is by causing symptoms of dry eye – watering, grittiness, and soreness. You may also find that bright lights are uncomfortable.  

TED can also cause some changes to the appearance of your eyes, and in some cases, to your vision:

  • Your eyelids can become puffy and red (lid swelling), which is often more obvious in the morning.
  • Your upper eyelid can rise to a higher position than normal, known as eyelid retraction. This can make more of the white of your eye visible, giving a “staring” appearance.
  • The soft tissues behind your eyeball can swell, pushing your eyes forward so that they “bulge” (called “exophthalmos”, or “proptosis”).
  • Your orbits (eye sockets) may become painful, particularly when your eyes move.
  • The muscles that move the eyeball can become swollen which can cause double vision (diplopia).
  • If the pressure inside your eye sockets increases, it can squash (compress) the optic nerve, which can cause blurring or dimming of your vision. Very few people with TED experience this, but it’s important to get medical attention straight away if you notice these changes to your vision.

Most people only get a mild form of TED. You may have dry eye which can be managed easily with lubricating eye drops. You may have some eyelid retraction or exophthalmos and any double vision you have may come and go and not cause too much difficulty.

Diabetic Retinopathy

Another retinal disease that can cause legal blindness is diabetic retinopathy. Patients with diabetes can lose vision from swelling or bleeding in the retina, or from retinal detachment. Diabetics can decrease their risk of legal blindness with good blood sugar and blood pressure control and annual eye exams.

What Matters In A Snake Control

The dos and don’ts of snake safety

Most snake bites occur when a snake is handled or accidentally touched by someone walking or climbing. Rattlesnakes, water moccasins and copperhead snakes are responsible for the overwhelming majority of venomous snake bites

Although most snakes are not aggressive and will slither away at the first hint of human presence, people should still take precautions to lessen the chance of being bitten – particularly in wooded areas around lakes or ponds.

MITIGATING THE HAZARD

Here are some tips to help mitigate the hazard of incurring a venomous snake bite.

• Use the buddy system when walking or running on trails near wooded areas.

• Do not step or put your hands where you cannot see.

• Wear over-the-ankle boots, thick socks and long loose pants, especially when venturing off of heavily used trails.

• Tap ahead of you with a walking stick before entering an area where you can’t see your feet. Snakes will try to avoid you if given enough warning.

• When possible, step on logs and rocks, never over them as you may surprise a sheltering snake.

• Avoid walking through dense brush or blackberry thickets.

• Be careful when stepping over a doorstep. Snakes like to crawl along the edge of buildings where they are protected on one side.

• Avoid wandering around in the dark. If you are out at night, always use a flashlight, because most snakes are active on warm nights.

• Never try to pick up a snake, even if it is dead. A snake’s reflexes can still cause the snake to strike up to an hour after it has died.

• If you have an encounter with a snake, give it the right-of-way. Do not attempt to kill the snake, just move out of the snake’s way.

• If you encounter a snake in the housing area or in your yard, call the police desk and follow their instructions.

• If you hike often, consider buying a snake bite kit – available from hiking supply stores. Do not use older snake bite kits, such as those containing razor blades and suction bulbs.

WHAT TO DO IF BITTEN

Despite taking all safety precautions, we cannot completely eliminate the hazard, so it is a good idea to have a plan about what to do in the event you, your child, or a buddy is bitten by a snake. When it comes to treating a venomous snake bite, the most important thing to do is get to a medical facility as quickly as possible.

the following first aid measures:

• Keep the person calm, reassuring them that bites can be effectively treated in an emergency room. Restrict movement. Immobilize the site and keep it below heart level to reduce the flow of venom.

• Remove any rings or constricting items because the affected area may swell. Create a loose splint to help restrict movement of the area.

• Bring in the dead snake only if this can be done safely. Do not waste time hunting for the snake, and do not risk another bite if it is not easy to kill the snake. Be careful of the head when transporting it – a snake can actually bite for up to an hour after it’s dead.

• If you have a pump suction device (such as that made by Sawyer), follow the manufacturer’s directions.

Snakes

What to do when there is a snake in the house?

Resist the urge to attack it with a broom or stick. Do not confront the snake and keep your distance away from the snake. The snake may try to look for a dark and secure area and you should observe to see where it hides, so that it can be removed by professionals.

Make sure that young children and pets like dogs or cats are kept away from the room or area where the snake is, as they may be curious and try to approach the snake.

Close all doors in the room, except for those that lead to the outside like your balcony, patio or front doors. Sometimes the snake will look for an escape route and will use these openings.

If the snake is in the garden, spray it gently with a water hose to send it on its way while keeping your distance. This will persuade the snake to leave the area. If you find a snake in your pool, you can use a long handled leaf skimmer to gently remove the snake, as it may not be able to get out on its own if it is small or exhausted from swimming.

If the snake is in an open area like the floor and not moving much, the best thing to do is to place an object over it like a heavy blanket or towel. Hold the towel/blanket in front of you when approaching it, and then firmly cast it over the snake. The snake should immediately calm down and will feel secure if it cannot see what is going on outside the blanket. If possible, place heavy objects around the edge to prevent the snake from slipping out from underneath the towel/blanket and escaping. This will buy you some time to get help.

If the snake is found in a drawer, behind furniture or somewhere difficult to access, leave it alone; move all family members away from the immediate area and, most of all, do not attempt to interact with it at all. Call for professional help. Have someone to keep an eye on the snake from a safe distance and note where it goes into hiding while you are contacting for help.

Next, find out why the snake came to your area. Do you keep rodents or birds? Are there birds nesting in your garden, do you have a rodent problem in the house or garden? Some snakes prey on small mammals like rabbits, rats and cats, as well as birds and amphibians.

How to Get Rid of Snakes in Yard & House

Get Rid of Those Snakes!

Whether you are enjoying your yard or are in your home, it can be shocking coming face-to-face with a scaly, unexpected house guest. Snakes aren’t your typical house pest. They are harmless when they aren’t infesting your home or hiding away on your property. Most species will leave us alone – but they can be temperamental if approached.

Though snakes are good for the ecosystem and keeping rodent populations low, these slithering reptiles can be quite destructive and even deadly. Before you attempt to “charm” your visitor away from your home, which is not recommended unless you are a professional, here is some information about common snakes and nine tips on how to deal with them.

There are over 3,000 species of snakes around the world, but there are a few prominent types that tend to live. While these species can be spotted in other areas, the kind you find will likely depend on your surroundings. If you are near a body of water, the forest, or in a dryer area, the type of snake you may encounter will be different. While it is possible to be bitten by snakes, it should be noted that snakes are not poisonous – they are venomous. This means they can only transfer venom through a bite

To get a better idea of what you may be dealing with, here are the most common reptiles:

Garter: Often called the garden snake. Their most notable feature comes in yellow lines on their bodies. These snakes are mildly venomous, but it is not harmful to humans. They tend to live in grasslands and can be gray, red, black, or brown.

Copperhead: Semi-aquatic, venomous snakes. They live in marshes, wetlands, or similar areas. They are typically copper-colored, with reddish-brown bodies. If bitten, you will need an anti-venom.

Rattle Snakes: Known for their rattling tale. These venomous snakes have interlocking scales and will rattle their tail to you as a warning. They are generally light brown with dark brown spots.

Water Snake: Non-venomous snakes with aggressive behavior. Their typical habitat is near water. They can grow to about five feet long and have a rounder head than other snake species.

Keep Grass Trim and Clean

Snakes seek warm, moist areas with a food source. They also look for areas abundant in rodents. These reptiles like places to hide, and an overgrown yard is just the perfect place. An excellent way to discourage snakes populations is by keeping your grass cut. Additionally, if you routinely trim your lawn, you won’t run into any unexpected dangers while doing so.

venomous snakes and how to react if you see one

Copperhead – Agkistrodon contortrix

Status: Lowest conservation concern

Range in: Common statewide

Fun fact: Since copperhead venom dissolves tissue, researchers are working on synthesizing the protein in the venom in order to fight cancer.

Cottonmouth – Agkistrodon piscivorus

Status: Lowest conservation concern

Also known as: Water moccasin

Range in: Common throughout the state

Fun fact: Cottonmouths are the only venomous semi-aquatic snake in North America.

As long as you know how to react, an encounter with one of venomous snakes is not necessarily dangerous.

During walks in the woods, wear closed-toe shoes and long pants .

Additionally, look 3 to 5 feet ahead of you to avoid accidentally stepping on a snake.

Don’t put your hands or feet anywhere that you cannot fully see. Avoid sticking your hands in rocky outcroppings, piles of brush, or under tree stumps.

If you encounter a snake that might be venomous, slowly walk away

Additionally, if you find a snake on your property–ask yourself why the snake is there. More than likely, your property is prime real estate to snakes. Here are a couple of tips to make your yard less ideal for snakes.

Keep your lawn mowed and cleared of brush and branches.

Don’t leave pet food outside. Pet food attracts rodents, which then attracts snakes.

What to do if you are bitten by a snake

According to the Center for Disease Control, there are roughly 8,000 recorded snake bites in the United States every year. However, only about five end up being fatal. As long as you seek immediate medical attention, a snakebite is not a death sentence.

Snakes of Connecticut

Snakes Are Fascinating!

They survive in some of the most extreme environments on Earth and occur in a variety of habitats everywhere around the world

Snakes Are Reptiles

They are long and slender, covered with scales, and have no limbs. The scales can come in various shapes and can either be keeled (with a raised ridge down the center) or smooth (without the ridge). The wide scales on a snake’s belly are called ventral scales.

Snakes Are Ectothermic (cold-blooded)

Their body temperature changes with the temperature around them. A snake will bask in the sun to warm up or it will take refuge in a cool, shady spot when the weather is hot. In colder environments, snakes will brumate during winter. Unlike hibernation when animals are asleep, brumating animals are awake but inactive.

Snakes Cannot Blink their Eyes

The eyes are covered with a clear protective membrane called a spectacle.

Snakes Are Carnivores

They eat other animals, such as mice, birds, fish, frogs, insects, and even other snakes.

Moving Like a Snake

Despite a lack of limbs, snakes have developed a variety of ways to move and get around. Snakes have a flexible spine made up of 200-400 vertebrae, each of which is attached to a pair of separate, thin ribs. Most snakes move in a series of S-shaped curves, pushing themselves along using plants, rocks, sticks, and other surfaces as shove-off points. A few desert snakes move using a complicated series of sideways body twists (known as sidewinders). Some snakes are also very adept at swimming in water.

Where To Find And Purchase Cheap Truck Tires

Never choose the wrong commercial truck tires again

Tires are the literal wheelhouse of your fleet. Without the right commercial tires, your equipment can cost your company more money and headache than you ever anticipated. We offer the industry’s top selection of commercial truck tire options. Find out how we can help you when choosing commercial truck tires, whether you need to outfit one truck or a nationwide fleet.

Importance of Truck Tires

As the primary point of contact with every paid mile of freight for your company, tires are a huge deal. A truck tire blowout is terrifying and can lead to a serious truck accident. Making sure you choose the highest quality of truck tires helps reduce overall operational cost.

Along with cutting down on braking time, a good set of truck tires will keep your trucks upright and moving down the road with minimal interference. The best brands of commercial truck tires on the market include Bridgestone and Michelin but are not limited to these manufacturers.

Selecting Tires for Workloads

The best tire for one of your work trucks might not be the right solution for your entire commercial fleet. Tire selection depends on a variety of factors including the typical terrain, weather conditions, cargo capacity and vehicle type.

For example, truck driving teams that frequently pass through wintry northern states with oversized freight will want to look into steer tires. This type of commercial tires provides drivers with extra control in wet and icy conditions.

What to Avoid in Tires

What about buying used truck tires that have been retreaded to get more mileage out of the already worn treads? We have all heard of purchasing retreaded tires for commercial trucks.

However, this is a dangerous practice that can leave the driver with new tread peeling on the highway. Using retreaded tires can lead to issues with your insurance company, as well as lawsuits if your drivers are involved in trucking accidents due to retreaded tires.

Benefits of Truck Tire Maintenance

Instead, go with the highest-quality new commercial truck tires for your fleet. Along with choosing the right tire, you also want to establish a truck maintenance service for your trucks. Truck maintenance covers tire wear and tear, as well as any repairs that are needed during deliveries.

FACTORS TO CONSIDER WHEN BUYING TRUCK TIRES

When preparing to invest in new tires, make it a point to consider how much money you will spend during a tire’s whole useable life, not just how much the tire costs initially. Here are four things to keep in mind when considering that new tire purchase.

  • Buy tires from someone who cares. Consult with your local Goodyear Commercial Tire & Service Center. The professionals there can evaluate your truck’s needs and make appropriate tire recommendations.
  • Cheaper is not always better. Look for tires with premium casings that can be retreaded more frequently, which can allow you to help optimize your initial tire investment.
  • Consider retreading. Goodyear offers retreads that match the tread designs of new tires in order to provide premium performance and appearance. For more info about retreading, consult your nearest Goodyear Commercial Tire & Service Center.
  • Take good care of your tires. Establish a comprehensive maintenance program for your tires that incorporates inflation checks, alignments and other functions.

Also, make sure you maintain truck suspension and steering system components. Worn shocks, bearings and tie rod ends can contribute to faster tire wear.

The Pros and Cons of Having a Lift Kit

If you have ever ridden around in a truck that is extremely high off the ground, you know the feeling of ultimate power you get from looking down at the cars on the road. Body lift kits are designed to lift your truck or SUV two or three inches higher by putting a high grade nylon spacer between the body and the frame. Suspension lift kits are made to lift trucks as high as the owners will let them. But what are the downsides to putting a lift kit on? Do the kits change the vehicle? Let’s go over the pros and cons of lifting your truck or SUV.

Pros of Body Lift Kits

Lift kits are specially made not to change the quality of how your truck rides. Most lift kits are not too expensive and they are more economical than suspension lifts. Because the shocks are not touched during the lift, new shocks are not required for lift kits. For people who like to go “off road,” lift kits will give your tires more clearance while still retaining the factory suspension geometry and alignment.

Pros of Suspension Lift Kits

Although body lift kits can only be moved one to three inches higher, suspension lift kits can go as high as the driver feels comfortable. This lift allows the owner to purchase bigger tires if they desire. This lift also makes the suspension more articulate.

Cons of Suspension Lift Kits

The annoyance factor can no be overlooked here. It can get annoying climbing in and out of a beast of a truck so before choosing a monster truck, try to picture yourself and your family climbing in and out of it. This lift comes with some maintenance. The supporting pieces may need to be replaced every so often so make sure you are prepared for the costs involved. These kits are also more expensive overall because of the customization done to them. It can void some warranties on your truck or SUV and you will not have a ride as smooth as one without a lift or with a body lift.

Body lift kits are good if you do not want your truck or SUV to perform differently. The quality of the drive remains the same when these lifts are involved. If you want a kit that will raise your truck only a few inches without being a problem, this is the kit for you! If you are looking for that monster truck feeling, the suspension lift kits are for you. Your truck can be raised as high as your budget will allow but be prepared for quite a bit of upkeep as well as having a stepladder in your

Cons of Body Lift Kits

Lift kit installations are more time consuming because of the nature of the job. These kits require the body to be lifted and bolted back into place. A big downside of the lift kit is that the frame is more visible than it was before and gaps can be seen in the fender wells. Unfortunately, due to placement of the body, factory bumpers are not raised with the body. A common complaint with lift kits are the frame visibility. This could be taken care of by gap guards place on the frame. This type of lift does not offer any performance advantages and can hinder the performance because of the new center of gravity.

4 Inch vs. 6 Inch Lift Kit

Any lift kit turns a truck into a piece of beauty – the only issue here is that there are a lot of them out there to choose from, and that my friends makes the whole selection process fairly complicated.

On this post i will be talking about probably the most common, i.e. 4 and 6 inch kits, and guide you through on what to actually go for, from my perspective.

4 inch pros

Fits in more spots

Because the pickup isn’t lifted as high, you will be able to access more places. By that i mean garages, parking spots, car washes, etc.

This may sound stupid at first, though i can tell you that there are a ton of people who go exactly for the shorter lift because of this reason – think about it, if the thing can’t fit in the garage, where are you going to put it?

Ease of use

It’s going to take less effort to access a pickup truck that is lifted only by 4 inches, literally.

Again, this might sound weird at first, but if you’re going to be getting in and out of the cab or the bed all the time, you’re going to thank me that you went this route.

Less severe on the fuel consumption

Now i know that truck owners, especially those who already think of lifting one, probably aren’t really concerned about this, but still.

A 6 inch lift kit would require larger tires than a 4 to make the whole deal look proper, and as we all know, the bigger the tire the more power needs to be generated in order to drive it, hence the decrease in fuel economy.

Generally less expensive

The cost comes from the fact that the pickup won’t need to sport larger tires, that is, a 33 inch tire will definitely be a bit more affordable than the 35’s.

6 inch pros

More off-road

A vehicle raised by 6 inches instead of 4 inches will sit on a higher level, therefore be able to perform better in not-so-favorable conditions, even more so if it’ll have taller tires installed.

What should i go for then?

The only reason why a 6 inch lift kit would be a smarter choice is if you really need to hit the off-road, if you ask me.

The 4 inch lift provides just enough raise to make the truck look far better than a stock, and still provide it with enough benefits that come from increased level of clearance. This pick makes only more sense if your truck is also a 2WD.

If you really can’t decide between the two, what you can try is literally test drive pickup trucks that feature both types of the suspensions kits. After it, you might end up going for the entirely different route than you thought of first.